In the digital age, backing up your iPhone data is crucial for protecting your memories and important information. But what happens when you need to restore this data from an external hard drive? Whether it’s due to a device upgrade or a mishap, understanding how to securely transfer your backup is essential. In this guide, we’ll walk you through the process of restoring your iPhone backup from an external hard drive. For specialized help and more on data recovery in Los Angeles, our team at ASAP Data Recovery Services is always ready to assist.
Preparing for the Restoration Process
Before diving into the restoration process, it’s important to set the stage for a smooth and successful experience. This preparation involves two key steps: making sure your backup file is good to go and ensuring it will play nice with your iPhone.
Verifying Your Backup File
The first step is to check your backup file. This is like making sure you have all the pieces before you start putting together a puzzle. You need to locate the backup file on your external hard drive. It usually ends with the extension “.backup” or is stored in a folder named ‘Backup’. Once you find it, take a moment to check the file size and date. A recent file with a reasonable size (not too small) is usually a good sign that your backup is complete and not corrupted.
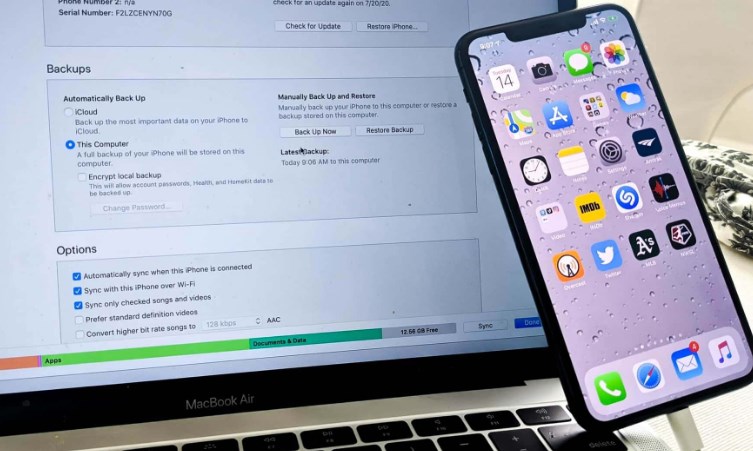
If you’re on a Mac, you can find your backups in the Library/Application Support/MobileSync/Backup folder. For Windows users, they’re typically in the Users[username]\AppData\Roaming\Apple Computer\MobileSync\Backup folder. If you’re having trouble finding your backup, a quick internet search can guide you based on your operating system.
Ensuring Compatibility with Your iPhone
Next up, let’s make sure the backup you have will work with your iPhone. This step is like checking if a key fits a lock. Generally, backups are compatible with iPhones running the same or a newer version of iOS than the one used to create the backup. For instance, a backup made on iOS 14 should work on an iPhone running iOS 14 or 15, but might not work if your phone is still on iOS 13.
To check your iPhone’s iOS version, go to Settings, then General, and finally, About. If your iPhone’s iOS version is older than the one used for the backup, consider updating your iPhone. However, be careful with updates – always back up your current data before updating, just to be safe.
Preparing correctly makes the next steps easier and helps avoid any headaches during the restoration process. Remember, if you hit a snag or feel unsure, help from a professional service like ASAP Data Recovery in Los Angeles can be a lifesaver.
Steps to Restore iPhone from External Hard Drive Backup
Now that you’re set up and ready, it’s time to get into the heart of the matter: restoring your iPhone from the backup on your external hard drive. This process is a bit like baking a cake – follow the steps carefully, and you’ll enjoy a sweet success at the end!
Connecting the External Hard Drive to Your Computer
First things first, let’s connect your external hard drive to your computer. This step is as simple as plugging in a USB cable. Most external hard drives use a standard USB connection, so find a free USB port on your computer and plug in the drive. If you’re using a newer computer that only has USB-C ports, you might need an adapter.
Once connected, your computer should recognize the external hard drive and show it as a new drive. On a Mac, it’ll appear on the desktop or in the Finder sidebar. For Windows, you’ll find it in ‘This PC’ or ‘Computer’. If your computer doesn’t recognize the drive, try a different USB port or check the drive on another computer to make sure it’s working properly.
Using iTunes or Finder for Restoration
With your external drive connected, it’s time to use iTunes (for Windows and older Macs) or Finder (for macOS Catalina and newer) to restore the backup to your iPhone. Here’s how to do it:
- Open iTunes or Finder: If you’re using iTunes, launch it. On a Mac with macOS Catalina or newer, open a Finder window.
- Connect your iPhone: Use a USB cable to connect your iPhone to your computer. Trust the computer if prompted.
- Select your device: In iTunes, look for the small iPhone icon near the top. In Finder, your iPhone will appear in the sidebar under ‘Locations’.
- Choose ‘Restore Backup’: In iTunes or Finder, find the section managing backups. Click on ‘Restore Backup’.
- Choose the backup from your external drive: You might need to navigate to the backup file on your external hard drive. Look for the file or folder you verified earlier.
- Start the restoration process: Once you’ve selected the right backup, click ‘Restore’ and wait. This can take a while, depending on the size of your backup.
Keep your iPhone connected and don’t use it until the restoration process is complete. Once done, your iPhone will restart, and then you should see all your data, just as it was at the time of the backup.
Troubleshooting Common Restoration Issues
Even with careful preparation and following the steps correctly, you might encounter some bumps along the way during the restoration process. Think of these like small hurdles in a race – with the right approach, you can easily jump over them and reach the finish line.
Addressing Error Messages During Restoration
Encountering error messages can be frustrating, but they’re often fixable. Here are some common issues and how to handle them:
- “iTunes could not restore the iPhone because the backup was corrupt or not compatible with the iPhone being restored”: This message means there’s an issue with your backup file. It could be corrupt, or it might be from a version of iOS that’s not compatible with the iPhone you’re trying to restore. Double-check that your backup is from a similar or newer iOS version than your iPhone. If the backup is indeed corrupt, you might need to use a different backup file.
- “iTunes could not restore the iPhone because the iPhone disconnected”: This error usually pops up if there’s a problem with the USB connection. Make sure your cable is securely connected, and your iPhone has enough charge. Also, try different USB ports or a different cable.
- “Not enough space on iPhone to restore backup”: This one’s straightforward – you need more space on your iPhone. Try deleting some data you no longer need, like apps, photos, or videos, and then attempt the restore again.
Solutions for Incomplete or Corrupted Backups
Sometimes, you might find out that your backup is incomplete or corrupted. Here’s what to do:
- Use a different backup: If you have more than one backup, try using a different one. It’s always good to have multiple backups just in case one fails.
- Third-party tools: There are various third-party tools available that can help repair or recover data from corrupted iPhone backups. However, be cautious and choose a reputable tool.
- Professional help: If you’re dealing with a severely corrupted or incomplete backup and the data is crucial, it might be time to call in the experts. Professional data recovery services, like ASAP Data Recovery in Los Angeles, have the tools and expertise to retrieve data from damaged backups.
Tips to Ensure a Smooth Restoration Process
A little bit of foresight and planning can make a big difference in ensuring a smooth restoration process for your iPhone. Think of it like prepping your workspace before starting a big project – the better you set things up, the easier everything goes.
Keeping Your Software Updated
Keeping your software up-to-date is like having the right tools for the job. Here’s why it’s important:
- Compatibility: Software updates often include improvements that ensure compatibility between your iPhone and the backup you’re trying to restore. This is especially important if you’re restoring to a newer model of iPhone.
- Security: Updates also patch security vulnerabilities, which can protect your data from being compromised during the restoration process.
- Performance: Updated software usually runs smoother and more efficiently, which can speed up the restoration process.
Before you start restoring, check that your iPhone’s iOS, your computer’s operating system, and iTunes (if you’re using it) are all up to date. On your iPhone, go to Settings > General > Software Update. On your computer, the process will vary depending on whether you’re using a Mac or a Windows PC, but generally, you’ll find software update options in the system settings.
Avoiding Data Loss During Restoration
The last thing you want is to lose data during the restoration process. Here’s how to avoid that:
- Backup Your Current Data: Before you restore from an external backup, make sure to back up any current data on your iPhone. This way, if something goes wrong during the restoration, you won’t lose everything.
- Use a Stable Connection: Make sure your iPhone is connected to your computer with a reliable cable throughout the process. A loose connection can interrupt the restoration and potentially lead to data loss.
- Don’t Interrupt the Process: Once the restoration starts, it’s important to let it run its course without interruption. This means not disconnecting your iPhone, not closing iTunes or Finder, and ensuring your computer doesn’t go to sleep during the process.
- Have Enough Battery Life: Ensure your iPhone has enough battery life to last through the restoration. It’s a good idea to keep it plugged into a charger just to be safe.
By following these tips, you can greatly increase the chances of a hassle-free restoration process. And remember, if you feel unsure at any point, professional services like ASAP Data Recovery in Los Angeles are just a call away. They can guide you through the process or handle it for you, ensuring your data is safely restored.
Alternative Methods for iPhone Data Recovery
Sometimes, the standard method of restoring your iPhone from a backup on an external hard drive might not work out. In such cases, it’s good to know there are alternative paths you can take. Think of these as your plan B – different ways to achieve the same goal of getting your data back.
Using Third-Party Software for Data Recovery
Third-party software can be a great alternative when traditional methods fall short. These are specialized programs designed to dive deeper into your data recovery needs. Here’s how to use them:
- Choose the Right Software: Look for reputable data recovery software that’s known for its effectiveness with iOS devices. Do some research, read reviews, and possibly try a free trial if available.
- Download and Install the Software: Once you’ve selected the software, download and install it on your computer. Make sure you’re getting it from a legitimate source to avoid any security risks.
- Connect Your iPhone: With the software installed, connect your iPhone to your computer using a USB cable.
- Follow the Software Instructions: Each software will have its own set of instructions, but generally, you’ll need to select the type of data you want to recover and then initiate the scanning process.
- Preview and Recover Data: After the scan, these programs usually allow you to preview the recoverable data. You can then select what you want to restore and save it back to your iPhone or your computer.
Remember, while third-party software can be effective, it also comes with risks, such as data corruption or loss, so use it cautiously.
Professional Data Recovery Services
When all else fails, or if you’re not comfortable handling the recovery process yourself, professional data recovery services are your best bet. Here’s why you might consider this option:
- Expertise and Experience: Professionals have the tools, knowledge, and experience to handle complex data recovery situations that software alone can’t manage.
- Handling Severely Damaged Devices: If your iPhone is physically damaged or the data is severely corrupted, professional services are often the only solution.
- Safety and Security: Professional services ensure that your data is handled securely, maintaining your privacy and data integrity.
- Peace of Mind: Knowing that experts are handling your data recovery can provide significant peace of mind, especially when dealing with precious or critical data.
ASAP Data Recovery in Los Angeles, for example, offers a wide range of data recovery services. They can help you retrieve lost data from various scenarios and devices, including iPhones. If you’re struggling with data recovery, reaching out to them could be a wise decision.
Final Words:
Restoring your iPhone backup from an external hard drive doesn’t have to be a daunting task. By following these steps and tips, you can ensure a smooth data transfer process. However, if you encounter any complex issues or need professional assistance, remember that ASAP Data Recovery Services is here to help.
With our expertise in various data recovery services, including hard drive, RAID, SSD, and Apple Mac data recovery, you can trust us for reliable and efficient solutions. Don’t hesitate to reach out to us at our Canoga Park, CA office at 21133 Victory Blvd #209, or give us a call at +13238432444. We are dedicated to serving the Los Angeles community with top-notch data recovery services.